Install
These instructions will take you through the process of installing and configuring Predbat for first-time use.
If you have a working Predbat installation using AppDaemon and are changing to use the Predbat app, the AppDaemon to Predbat app upgrade process is described below.
It's recommended that you watch the Predbat Video Guides before you start.
We have tried to make the documentation as comprehensive as possible but a level of familiarity with the basics of Home Assistant, Apps, Integrations, Entities, File Editing and YAML is assumed. There are plenty of "Home Assistant basics" tutorials on YouTube, but here are a few useful videos to introduce you to Home Assistant and displaying inverter data:
- What is Home Assistant from Smart Home Junkie
- YAML Basics from This Smart Home
- Installing HACS from Speak to the Geek
- Setting up the Energy dashboard for GivEnergy inverters from Speak to the Geek
- Power Flow Card Plus from Speak to the Geek
If you get stuck, please read the FAQs and if necessary raise a GitHub ticket for support.
Inverter Control install
You will need to install an integration to communicate with and control your inverter. Predbat was originally written for GivEnergy inverters controlled by the GivTCP app but has been extended for other inverter types.
The specific integration you need will depend on the brand of inverter you have, please see Inverter Setup for details on installing and configuring the appropriate inverter control software so that Home Assistant is able to 'see' and manage your inverter.
For many inverters there are specific additional configuration steps for Predbat and additional controls, automations and scripts to be created for the inverter for Predbat to be able to control it.
You will need at least 24 hours of history in Home Assistant for Predbat to work correctly, the default is 7 days (but you configure this back to 1 day if you need to).
Editing Configuration Files in Home Assistant
The basic configuration for Predbat is stored in a configuration file called apps.yaml.
A standard GivEnergy template apps.yaml file for GivTCP will be installed as part of the Predbat installation and you will need to edit and customise this configuration file for your own system setup.
If you have a different inverter then you will need to use the appropriate apps.yaml template for that inverter.
You will need a method of editing configuration files within your Home Assistant environment.
There are several ways to achieve this in Home Assistant, but two of the simplest are to use either the File Editor or Studio Code Server apps. Whichever you use is a personal preference. File Editor is a bit simpler, Studio Code Server is more powerful but does require HACS (the Home Assistant Community Store) to be installed first.
If you do not have one of these file editors already installed in Home Assistant:
- For Studio Code Server you will need to install HACS first (see Speak To The Geek video linked above)
- Go to Settings / Apps / Install app (bottom right)
- Scroll down the app list, to find either 'File editor' or 'Studio Code Server' as appropriate, click on the app, click 'INSTALL'
- Once the editor has been installed, ensure that the 'Start on boot' option is turned on, and click 'START' to start the app
Thereafter whenever you need to edit a configuration file in Home Assistant you can navigate to Settings / Apps / editor_you_chose_to_use / 'OPEN WEB UI'. You can also turn the 'Show in sidebar' option on to give a quicker way to directly access the editor.
If you are using the File Editor to edit Predbat's configuration files, you will need to turn OFF the Enforce Basepath option to access files in different directories (i.e. within the apps directory):
- From the File editor app page, click on the 'Configuration' tab to change this setting). It is set to 'On' by default:
If you are using Studio Code Server it will default to showing just files and folders in the /config directory. To access the entire HA directory structure, click the three horizontal bars to the left of 'Explorer', File, Open Folder, type '/' (root) and click OK.
Predbat app install
Recommended
The simplest way to install Predbat now is with the Predbat app. The Predbat-Appdaemon app and Appdaemon install methods previously used for Predbat have been retired.
Go to settings, Apps, select Install app, three dots on the top right, Repositories, then add the following repo 'https://github.com/springfall2008/predbat_addon' to the list and click close. Now refresh the list and find Predbat, click on it and click 'install'. Ensure 'start on boot' is enabled and click 'start'.
Note: Throughout the rest of the Predbat documentation you will find reference to the Predbat configuration file apps.yaml and the Predbat logfile.
These are located under the Home Assistant directory /addon_configs/6adb4f0d_predbat which contains:
- predbat.log - Predbat's active logfile that reports details of what Predbat is doing, and details of any errors
- apps.yaml - Predbat's configuration file which will need to be customised to your system and requirements. This configuration process is described below.
You can use your file editor (i.e. 'File editor' or 'Studio Code Server' app) to open the directory /addon_configs/6adb4f0d_predbat and view these files.
The Predbat web interface will work through the Predbat app, you can click on the 'Web UI' button to open it once Predbat is running.
Docker Install
As an alternative to the Predbat app, Predbat can be installed via Docker
The Predbat docker image is https://hub.docker.com/r/nipar44/predbat_addon and is a fork of the Predbat app with updates so it will run directly as a Docker container.
Installation instructions can be found at https://github.com/nipar4/predbat_addon.
Predbat Installation Into Appdaemon
Installing HACS, Appdaemon and then Predbat within Appdaemon has been deprecated, please swap to either the Predbat app or Docker installation methods.
The process to upgrade from Predbat within Appdaemon to Predbat addon is described below.
Solcast Install
Predbat needs a solar forecast to predict solar generation and battery charging. If you have solar panels it's recommended to use the Solcast integration to retrieve your forecast solar generation.
If you do not want to use Solcast you can also use Forecast.solar (less accurate) - see below.
If you don't have one already, register for a free Solcast hobbyist account and enter the details of your system. You can create 2 sites maximum under one (free hobbyist) account, if you have more aspects then it suggests you average the angle based on the number of panels e.g. $7/10 * 240^\circ + 3/10 * 120^\circ$.
Make sure you configure the Azimuth (panel orientation) correctly in your Solcast account, Azimuth is not set as a 0-359 degree value, but rather as 0-180 for westerly facing, or 0 to minus 179 for easterly facing. The Azimuth value is the number of degrees angled away from North, with the sign being West or East. If you're not sure, then do some quick research and check your roof orientation with a protractor on Google maps.
Hybrid inverters only: If your hybrid inverter capacity is smaller than your array peak capacity, tell Solcast that your AC capacity is equal to your DC capacity (both equal to your array peak kW). Otherwise, Solcast will provide forecast data clipped at your inverter capacity. Let Predbat handle any necessary clipping instead. When supplied with the unclipped Solcast forecast data, Predbat can allow in its model for PV over the inverter capacity going to battery charging (bypassing the hybrid inverter).
You will need your API key for the next steps:
Predbat direct Solcast method
Predbat can obtain the solar forecast directly from Solcast and the Solcast integration described below is not required.
First, get your API key from the Solcast website, then as described in the Solcast apps.yaml documentation,
uncomment the Solcast cloud interface settings in apps.yaml and set the API key correctly:
  solcast_host: 'https://api.solcast.com.au/'
  solcast_api_key: 'xxxx'
  solcast_poll_hours: 8
NB: If you use Predbat to obtain your Solcast solar forecast then you can't
include the Solar Forecast within the Home Assistant Energy dashboard
as you can with the Solcast integration described below.
The Solcast integration also contains a 'solar dampening' feature that may be useful to reduce the solar forecast that Predbat receives at certain times of day,
e.g. if your panels are shaded by trees or buildings.
Predbat direct to forecast.solar
The Forecast.solar service can also be used in Predbat, the free version offer access without an API Key but is limited to hourly data and does not provide any 10% or 90% data. Predbat Solar calibration can use past data to improve this information and provide the 10% data.
You can create one or more rooftops by providing a list of the data for each one, they will be summed up automatically.
The latitude and longitude are your location in world, or for the UK you can set a postcode.
The azimuth is the direction of the roof: 0=North, -90=East, 90=West, -180/180 = South - note these are different to how Solcast measures azimuth so if you do swap from forecast.solar to Solcast, don't just copy the azimuth over!
The declination is the angle of the panels, e.g. 45 for a sloped roof or 20 for those on a flat roof
The efficiency relates to the aging of your panels, 0.95 is for newer systems but they will lose around 1% each year.
The optional forecast_solar_max_age setting sets the number of hours between updates to PV data, the default is 8.
The optional azimuth_zero_south (default False) can be set to True if you prefer to supply the azimuth already in the Forecast.solar convention (0=South, -90=East, 90=West, ±180=North) rather than the default Predbat convention (0=North). When True, Predbat passes the value straight to the API without conversion.
  forecast_solar:
    - postcode: SW1A 2AB
      kwp: 3
      azimuth: 45
      declination: 45
      efficiency: 0.95
  forecast_solar_max_age: 4
or you can set longitude and latitude if you are not in the UK or postcode does not work:
      latitude: 51.5072
      longitude: -0.1276
Optionally you can set an api_key for personal or professional accounts and you can also set 'days' to define how many future days of data the forecast includes (2 for free, 3 for personal or 6 for professional).
  forecast_solar:
    - postcode: SW1A 2AB
      api_key: 'xxxxx'
      days: 3
Note you can omit any of these settings for a default value. They do not have to be exact if you use Predbat auto calibration for PV to improve the data quality.
Predbat direct to Open-Meteo
Open-Meteo is a free, open-source weather API that provides solar irradiance forecasts. It requires no API key and is a good no-cost alternative to Solcast or Forecast.solar. Predbat fetches the Global Tilted Irradiance (GTI) for each array from Open-Meteo and converts it to a power estimate using a PVWatts cell-temperature model, so the forecast automatically accounts for hot days reducing panel efficiency and cool days slightly improving it. Ensemble members are used to derive a P10 pessimistic estimate alongside the central P50, just like Solcast.
You can define one or more arrays (roof aspects). For the UK, use a postcode instead of latitude/longitude.
The azimuth uses the same convention as all other Predbat solar configs (Solcast/Forecast.solar): 0=North, -90=East, 90=West, -180/180=South. Predbat converts this to the Open-Meteo convention (0=South) internally.
The optional azimuth_zero_south (default False) can be set to True if you prefer to supply the azimuth already in the Open-Meteo convention (0=South, -90=East, 90=West, ±180=North). When True, Predbat passes the value straight to the API without conversion.
The declination is the angle of the panels from horizontal, e.g. 35 for a typical pitched roof.
The efficiency (optional, default 1.0) is the panel efficiency as a fraction where 1.0 = 100% (no losses), e.g. 0.95 for 5% losses. This uses the same convention as Forecast.solar.
  open_meteo_forecast:
    - postcode: SW1A 2AB
      kwp: 3.5
      declination: 35
      azimuth: 180
      efficiency: 0.95
  open_meteo_forecast_max_age: 4.0
or with latitude/longitude if you are not in the UK:
  open_meteo_forecast:
    - latitude: 51.5072
      longitude: -0.1276
      kwp: 3.5
      declination: 35
      azimuth: 180
For a house with two differently oriented roof aspects, add a second entry to the list:
  open_meteo_forecast:
    - postcode: BS1 4DJ
      kwp: 1.56
      declination: 23
      azimuth: -133
    - postcode: BS1 4DJ
      kwp: 2.73
      declination: 45
      azimuth: 45
Solcast Home Assistant integration method
Install the Solcast integration (https://github.com/BJReplay/ha-solcast-solar), create a free Solcast account, configure details of your solar arrays, and request an API key that you enter into the Solcast integration in Home Assistant.
Make sure that the configuration option 'Enable forecast half-hourly detail attributes' is turned on as predbat requires the half-hourly detailed solar forecast to populate the predbat plan. By default the Solcast integration only provides hourly forecasts and Predbat will take each hourly PV forecast and treat it as a half-hour value - doubling your solar generation forecast!
Predbat is configured in apps.yaml to automatically discover the Solcast forecast entities created by the Solcast integration in Home Assistant.
Note that Predbat does not update Solcast integration for you so you will either need to use the default forecast auto-update within the integration, or create your own Home Assistant automation that updates the solar forecast a few times a day (e.g. dawn, dusk, and just before your nightly charge slot). Keep in mind hobbyist accounts only have 10 polls per day so the refresh period needs to be less than this. If you use the same Solcast account for other automations the total polls need to be kept under the limit or you will experience failures.
Due to the popularity of the Solcast Hobbyist service, Solcast has introduced rate limiting for Hobbyist (free) accounts. If your update gets a 429 error then this is due to rate limiting. Solcast recommends that you poll for updated solar forecasts at random times, i.e. don't poll at precisely X o'clock and zero seconds. The Solcast integration will auto-retry if it gets a 429 error, but to minimise the potential rate limiting the sample Solcast automation below contains non-precise poll times for just this reason.
Example Solcast update automation script:
alias: Solcast update
description: "Update Solcast solar forecast"
triggers:
  - trigger: time
    at:
      - "06:02:34"
      - "12:07:47"
      - "18:09:56"
      - "23:11:18"
conditions: []
actions:
  - action: solcast_solar.update_forecasts
    data: {}
mode: single
Manually run the automation and then make sure the Solcast integration is working in Home Assistant by going to 'Settings' / 'Developer Tools' / 'States', filtering on 'solcast', and check that you can see the half-hourly solar forecasts in the Solcast entities.
No solar
If you don't have any solar generation then use a file editor to comment out the following lines from the Solar forecast part of the apps.yaml configuration:
  pv_forecast_today: re:(sensor.(solcast_|)(pv_forecast_|)forecast_today)
  pv_forecast_tomorrow: re:(sensor.(solcast_|)(pv_forecast_|)forecast_tomorrow)
  pv_forecast_d3: re:(sensor.(solcast_|)(pv_forecast_|)forecast_(day_3|d3))
  pv_forecast_d4: re:(sensor.(solcast_|)(pv_forecast_|)forecast_(day_4|d4))
Energy Rates
Predbat needs to know what your electricity import and export rates are to optimise battery charging and discharging to minimise your expenditure.
These rates are configured in Predbat's apps.yaml configuration file. Follow the instructions in the Energy Rates document.
Note: that if you are using the Octopus integration the 'sensor.octopus_xxx' and 'event.octopus_xxx' entities must have a similar pattern of names for Predbat to work correctly - see the FAQ's if they are not.
Configuring Predbat
You will need to use a file editor (either the File editor or Studio Code Server app) to edit the apps.yaml file in Home Assistant
to configure Predbat - see Configuring apps.yaml.
When Predbat starts up initially it will perform a sanity check of itself and the configuration and confirm the right files are present. You will see this check in the log, should it fail a warning will be issued and predbat.status will also reflect the warning. While the above warning might not prevent Predbat from starting up, you should fix the issue ASAP as it may cause future problems.
Note: If you are running the Predbat through the Predbat app or via Docker you will get a logfile warning message.
Predbat Output and Configuration Controls
As described above, the basic configuration of Predbat is held in the apps.yaml configuration file.
When Predbat first runs it will create a number of output and configuration control entities in Home Assistant which are used to fine-tune how Predbat operates. The entities are all prefixed predbat and can be seen (and changed) from the Settings / Devices & Services / Entities list in Home Assistant or the Config view in Predbat web console.
It is recommended that you create a dashboard page with all the required entities to control Predbat and another page to display Predbat's charging and discharging plan for your battery.
The Output Data section describes these points in more detail including using the auto-generated predbat_dashboard.yaml dashboard file.
The Home Assistant entity predbat.status contains details of what status Predbat is currently in (e.g. Idle, Charging, Error). Detailed progress messages and error logging are written to the Predbat logfile which you can view within Home Assistant using a file editor.
The Predbat Configuration Guide gives an overview of the main Predbat configuration items and detail of 'standard Predbat configuration' settings for different electricity tariff types - e.g. a cheap overnight rate, multiple import rates during the day, and variable tariffs such as Agile, etc.
The detailed Predbat Customisation Guide details all the Predbat configuration items (switches, input numbers, etc) in Home Assistant, and what each of them does.
The Predbat Web Interface provides an easy way to view all of the Predbat configuration items, check apps.yaml for errors, and view the logfile.
Ready to light the touch-paper
By now you should have successfully installed and configured Predbat and the other components it is dependent upon (e.g. an inverter controller such as GivTCP, Solcast solar forecast, Octopus Energy integration, etc).
You have checked the Predbat log file doesn't have any errors (there is a lot of output in the logfile, this is normal).
You have configured Predbat's control entities, checked for apps.yaml errors, created some dashboard pages to control and monitor Predbat, and are ready to start Predbat generating your plan.
You may initially want to set select.predbat_mode to Monitor to see how Predbat operates, e.g. by studying the Predbat Plan.
In Monitor mode Predbat will monitor (but not change) the current inverter settings and predict the battery SoC based on predicted Solar Generation and House Load.
NB: In Monitor mode Predbat will NOT plan any battery charge or discharge activity of its own,
it will report on the predicted battery charge level based on the current inverter charge & discharge settings, predicted house load and predicted solar generation.
In order to enable Predbat to start generating your plan you must delete the 'template: True' line in apps.yaml once you are happy with your configuration.
Predbat will automatically run, analyse your house load, battery status, solar prediction, etc and produce a plan based on the current battery settings.
Check the Predbat logfile again for errors. Voluminous output is quite normal but any errors or warnings should be investigated. Read the Predbat FAQ's for answers to common questions you may have. Also, check the Predbat status predbat.status - major errors will also be flagged here.
Once Predbat is running successfully the recommended next step is to start Predbat planning your inverter charging and discharging activity, but not (yet) make any changes to the inverter. This enables you to get a feel for the Predbat plan and further customise Predbat's settings to meet your needs.
Set select.predbat_mode to the correct mode of operation for your system - usually 'Control charge' or 'Control charge & discharge'. Also, you should set switch.predbat_set_read_only to On to stop Predbat from making any changes to your inverter.
You can see the planned solar and grid charging and discharging activity in the Predbat Plan. Another set of views can be seen in the detailed Apex Charts showing Predbat's predictions.
Once you are happy with the plan Predbat is producing, and are ready to let Predbat start controlling your inverter charging and discharging, set the switch switch.predbat_set_read_only to Off and Predbat will start controlling your inverter.
Updating Predbat
Note that any future updates to Predbat will not overwrite the apps.yaml configuration file that you have tailored to your setup.
If new Predbat releases introduce new features to apps.yaml you may therefore need to manually copy across the new settings from the Template apps.yaml.
Update via Home Assistant
Recommended
Predbat can now be updated using the Home Assistant update feature. When a new release is available you should see it in the Home Assistant settings:
Click on the update and select Install:
Note that clicking the 'Skip' button gives an error about auto-update being enabled for Predbat and that the update cannot be skipped. This warning appears because of Predbat's built-in auto-update feature and can be safely ignored. If you wish to skip or ignore a Predbat update then you don't need to do anything; Predbat will not auto-update (despite what HA says) unless you turn on Predbat's auto-update (see below) or choose a version to install. Predbat will remain running on the current version until you choose to update.
Predbat built-in update
Recommended for manual selection of versions or automatic updates
Predbat can now update itself, just select the version of Predbat you want to install from the select.predbat_update drop-down menu, the latest version will be at the top of the list. Predbat will update itself and automatically restart.
Alternatively, if you turn On switch.predbat_auto_update, Predbat will automatically update itself as new releases are published on GitHub.
For testing against a fork, you can override the repository used when updating to main by setting this under your Predbat app in apps.yaml:
pred_bat:
  # ... existing Predbat config ...
  predbat_repository: your-github-user/batpred
Only the main update path uses this override; release tags in select.predbat_update are still read from the official upstream repository.
You can also set environment variable PREDBAT_REPOSITORY (same owner/repo format).
Once Predbat has been installed and configured you should update Predbat to the latest version by selecting the latest version in the select.predbat_update selector, or by turning on the switch.predbat_auto_update to auto-update Predbat.
Manually installing a Predbat release
The Predbat version selector select.predbat_update contains the last 25 Predbat releases, but sometimes if Predbat has stopped working, or if you wish to downgrade to an older version that is not on the drop-down menu, then you might need to manually install a Predbat release.
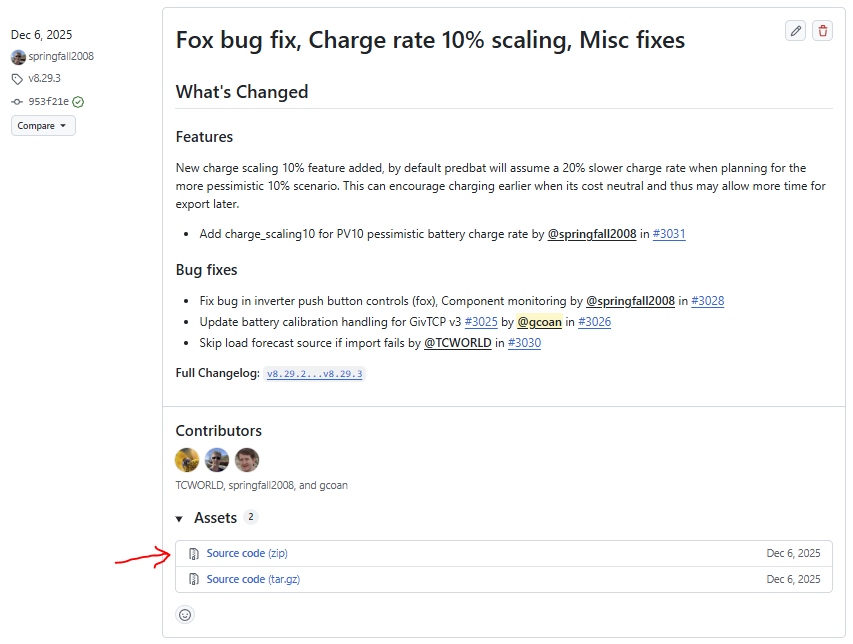
Go to Predbat releases on GitHub and find the release you wish to install.
From the Assets list, download the source code (zip) file:
- Unzip the source code file you have downloaded
- Navigate to the release sub folder, then
apps, and finally thepredbatsub-folder - Shutdown Predbat
- Copy all the .py files from the
predbatsub-folder into your Predbat application folder in Home Assistant and overwrite the existing .py files. If you are running the Predbat app then the destination folder will be/addon_configs/6adb4f0d_predbat - Restart Predbat
Upgrading from AppDaemon to Predbat app
These steps assume you already have a working Predbat system and want to upgrade to using the Predbat app instead of using either the AppDaemon or the AppDaemon-predbat app.
Using the Predbat app is the strategic direction for Predbat and resolves some performance and data load issues that can occur with AppDaemon. The Predbat code that runs is the same and the configuration is exactly the same, it is just changing the 'container' that Predbat runs within.
-
Before starting, watch the installing Predbat app video
-
Although the upgrade steps are low risk, take a full backup of Home Assistant before starting
-
- Add the Predbat app to the list of Repositories in the app store
- Install the Predbat app
- But do not start it - yet
-
Install a file editor if you don't have one already installed - either File Editor or Studio Code Server, it doesn't matter
-
Shutdown your existing AppDaemon or AppDaemon-predbat app:
- Go to Settings/Apps
- Click on the existing AppDaemon/AppDaemon-predbat app
- Click STOP, and untick 'Start on boot'
-
Briefly start the new Predbat app so that it creates the addon_config folder and the template
apps.yamlfile:- Go to Settings/Apps
- Click on the Predbat app
- Click START, wait a minute for the app to initialise itself, then click STOP. A predbat status warning that you have a template apps.yaml file is normal and can be ignored
-
Open your file editor and open your existing
apps.yamlfile:-
If you are using the old 'combined AppDaemon/Predbat app installation method' it's in the directory
/addon_configs/46f69597_appdaemon-predbat/apps, or -
with the old HACS Appdaemon app then Predbat installation method it's in
/config/appdaemon/apps/batpred/config/
-
-
Select all the contents of the apps.yaml file and 'copy' (control-C, command-C, etc as appropriate)
-
Now open the template
apps.yamlfile that's supplied with the Predbat app and has been created in the directory/addon_configs/6adb4f0d_predbat, select all the contents of the template apps.yaml file, and paste in the contents of your existing apps.yaml, overwriting the template with your specific configuration -
Now you are ready to swap from running the AppDaemon or AppDaemon-predbat app to the Predbat app:
- Go to Settings/Apps
- Click on the existing AppDaemon/AppDaemon-predbat app
- Make sure it is not running and 'Start on boot' is not ticked
- Click the back arrow
- Click on the Predbat app
- Click START, and tick 'Start on boot'
-
If you are using the Predbat automatic monitor then you will need to enable the predbat_running binary sensor and change the automation, replacing the AppDaemon app id (a0d7b954_appdaemon) with 'a06adb4f0d_predbat', and 'binary_sensor.appdaemon_running' with 'binary_sensor.predbat_running'.
And that's it.
You should check the Log tab to ensure it all starts properly, but it should do as you've copied over your existing configuration.
Note that if you are using the Predbat direct connection to Solcast then the Predbat app will need to download your solar forecast so will use up one or two of your daily API calls (hobbyist accounts have a 10 API calls a day limit). If you are using the Solcast integration then this won't be required.
You may find that the Predbat app installed with an older version of Predbat than you were previously using, which might require you to update Predbat to the correct version.
- When you are happily running the Predbat app you can delete the AppDaemon or AppDaemon-predbat app.
Backing up Home Assistant and Predbat
It's strongly recommended that you implement an automatic mechanism to back up your Home Assistant and Predbat system.
There are several ways of backing up Home Assistant but one of the simplest is the Home Assistant Google Drive Backup which is an app that runs every night, automatically makes a backup of Home Assistant (including Predbat), and copies that backup to a Google Drive for safekeeping.
If you create a new Google account specifically for your Home Assistant backups you will automatically get 15Gb of free Google Drive storage, enough for a couple of weeks of backups.
As well as the full Home Assistant backup you manually copy the contents of Predbat's apps.yaml configuration file to somewhere safe so that if you accidentally mis-edit it,
you can get Predbat working quickly again by copying it back again.
Uninstalling Predbat
Incredible though it may be to imagine, it's possible you may want to uninstall Predbat.
Removing the Predbat app is easy, System / Apps / Predbat then select 'Uninstall'.
It's recommended that you do a full restart of Home Assistant and all apps after removing Predbat.
You will find that entities created by Predbat unfortunately don't get removed when you remove the Predbat app, and as they do not have unique Home Assistant id's, they can't be removed from the Devices & Services / Entities list.
To remove the Predbat entities you will need to use a different mechanism and purge them from Home Assistant:
- 'Settings' / 'Developer Tools' / 'Actions'
- Search for 'Recorder: Purge Entities'
- Tick 'Domains to remove' and enter 'predbat' as the domain
- Tick 'Entity globs to remove' and enter '*.predbat_*'
- Tick 'Days to keep' and set to zero days
Then click 'Perform Action'
This will remove the Predbat entities. Then do another full reboot of Home Assistant all the apps.